 25 Questions for a Travel Agency Customer Satisfaction Survey

Getting Started with SurveyNinja
Updated
On this page
SurveyNinja is an online builder for surveys, forms and quizzes. You add questions in the builder, publish the survey, share the link and see the responses in reports.
Creating your first survey
- On the dashboard, click Create new survey.
- Choose how to start (1):
– Start from scratch: an empty survey.
– Survey from template: a ready-made survey from the Gallery or your team's My templates. See Custom Templates.
– With the help of AI: describe the topic, and the assistant drafts the questions. See Creating a Survey with AI.
– Micro survey: a short card in the corner of your website for a rating, NPS or feedback. See Micro Surveys on Your Website.
– Typeform or Google Forms (2): move a survey you already have. See Importing Surveys and Responses.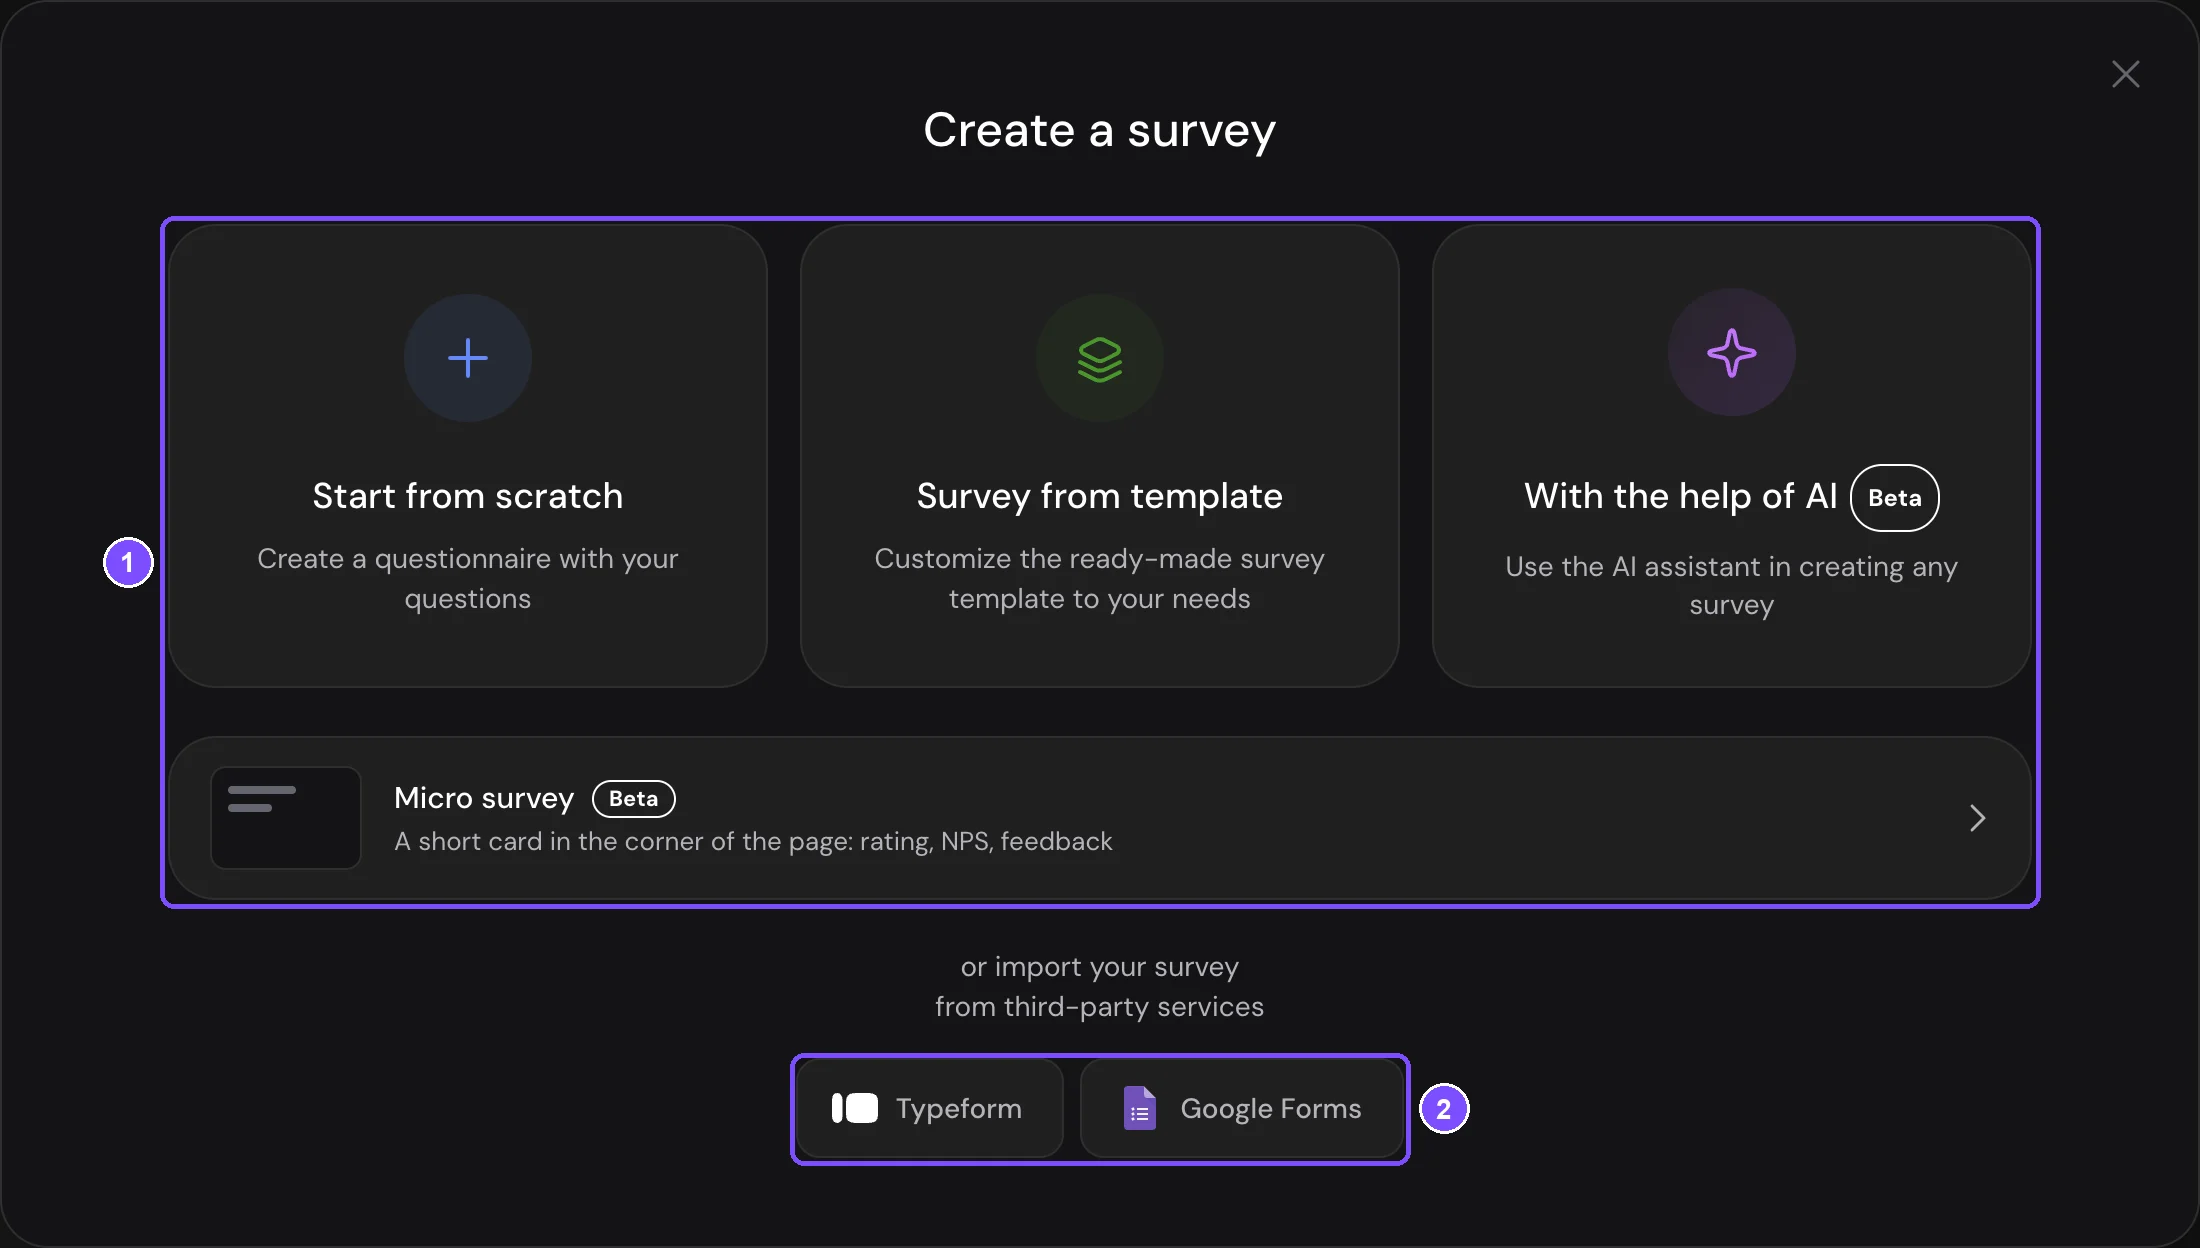
- For an empty survey, enter a name of at least 3 characters and click Create survey, or click Skip. The builder opens.
- Click + to add a question and choose its type. See Elements and Settings.
- Check the survey in Preview.
- Click Publish in the top right corner. The Share the Survey panel opens with the direct link to your survey and a Copy button. To open the panel again later, click Share the Survey in the top right corner.
- To embed the survey on your website or get a QR code, open Share. See Publishing a Survey and Adding It to a Website.
Responses appear in Results as soon as respondents submit them. When you edit a published survey, respondents see the changes only after you click Publish again.
Main sections
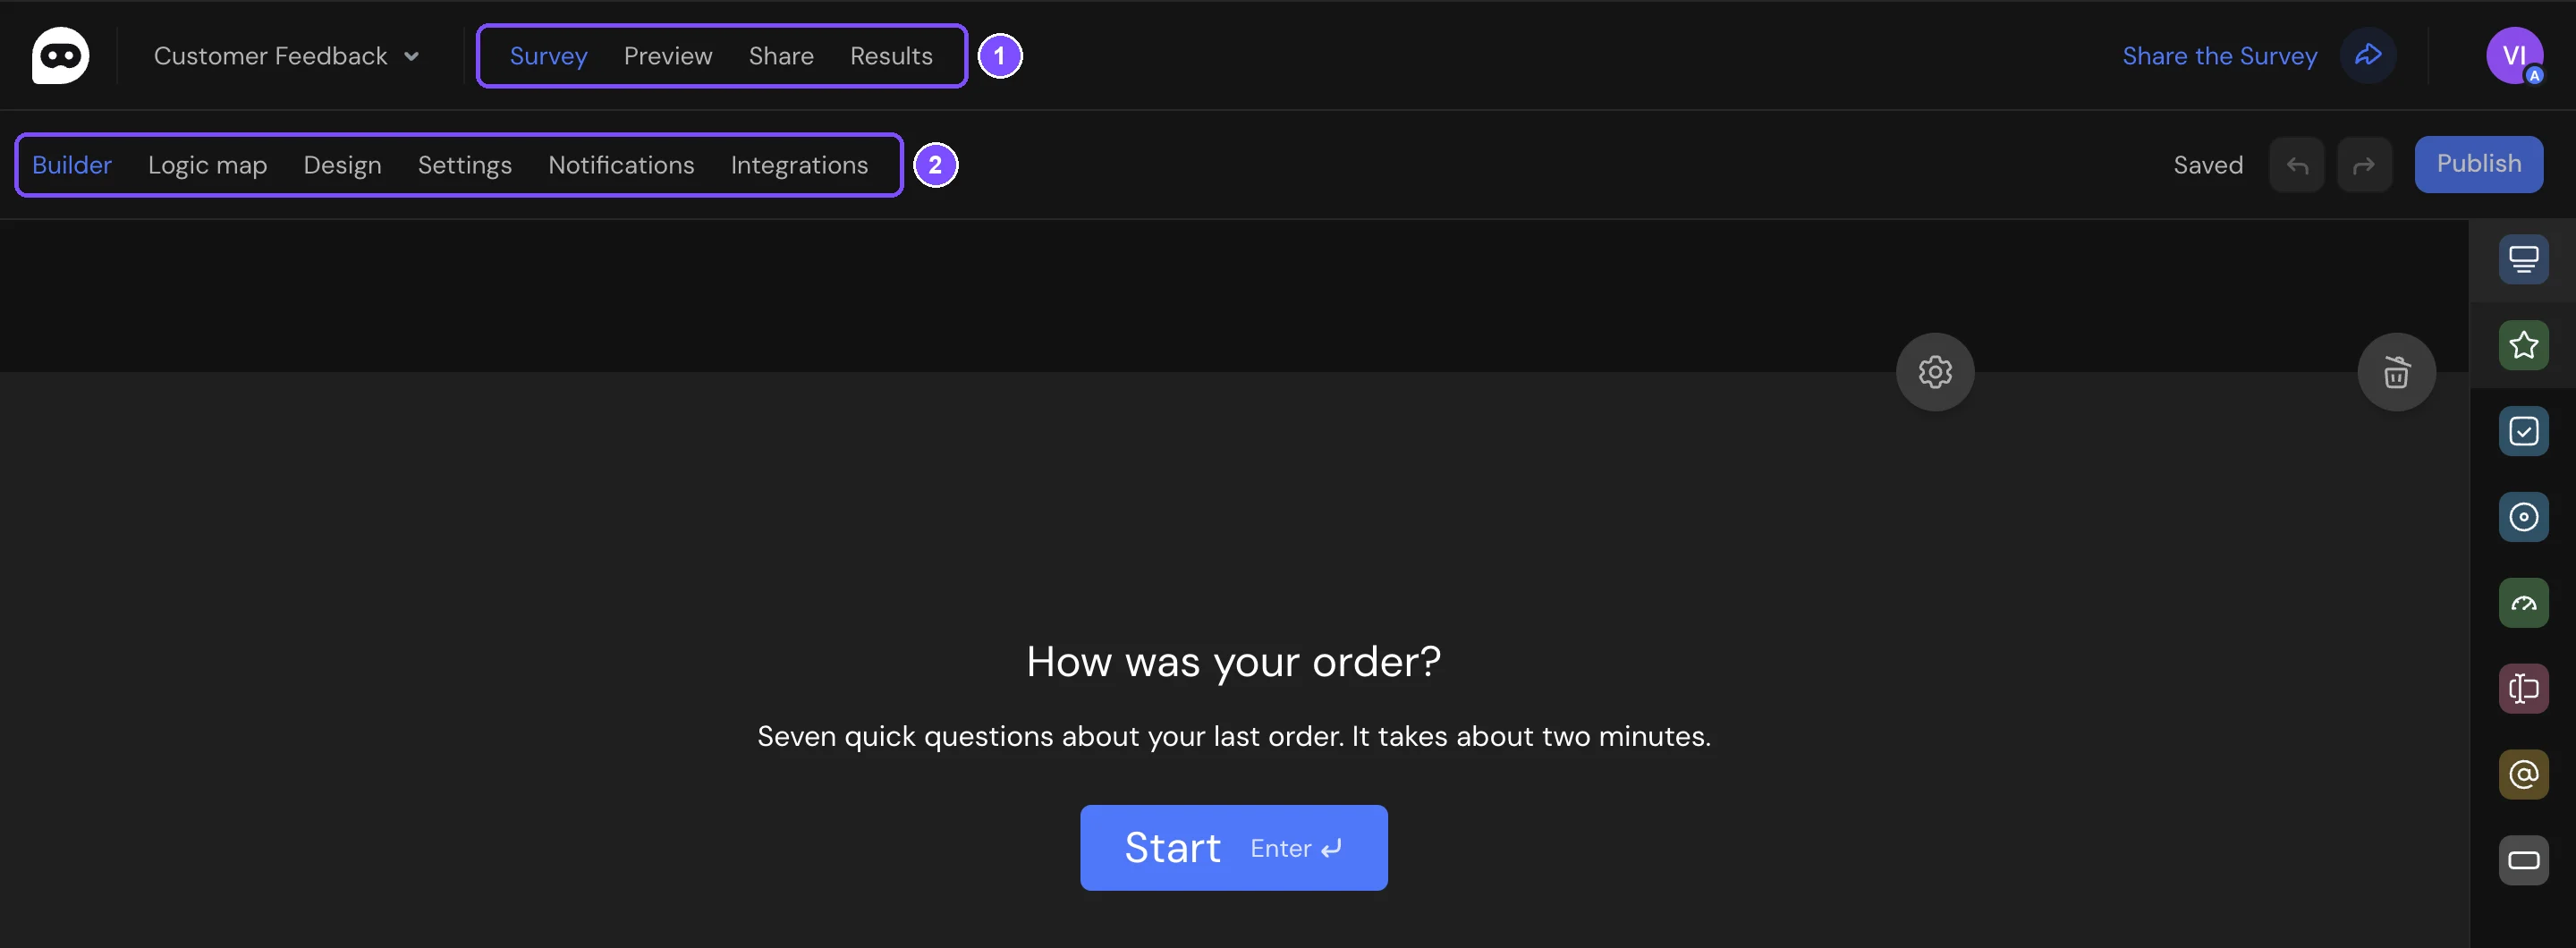
When a survey is open, the top menu has four sections (1). Survey, Share and Results have their own tabs in the second row (2).
| Section | Tabs | What you do there |
|---|---|---|
| Survey | Builder, Logic map, Design, Settings, Notifications, Integrations | Add questions, set up logic jumps, design, survey settings and email notifications, connect integrations such as Google Sheets |
| Preview | See the survey as respondents do. See Previewing Your Survey | |
| Share | Link, Social media, On website, QR code, Print, URL parameters | Get the link, embed the survey, add hidden variables. Available after the first publication |
| Results | Smart Analytics, Summary, Reports, Responses | Get an AI report, view reports, read and download responses |
Outside a survey:
- Dashboard: click the logo in the top left corner. The left panel lists your workspaces in the Personal section and, if colleagues have access to some of them, in the Shared section. My templates and Archive are below them. See Workspaces (Folders).
- Account: click your avatar in the top right corner. The menu includes Profile, Plans & Pricing, Billing, Members, Survey settings, SMTP, API / MCP and Help. To invite colleagues and give them roles, see Team Members and Roles.
If something doesn't work
- Publish is grey. The survey has no questions yet (the Welcome Screen and Thank You Screen don't count), or nothing has changed since the last publication.
- Publish is red. The survey has a critical logic error. Click ! next to the button to see the Logic issues, fix them, then publish.
- New responses don't appear in Results. Your plan's response limit is used up. New responses are still saved, but hidden. On the Responses tab, a banner shows how many are hidden and offers Purchase More Responses. See Viewing and Downloading Survey Responses.