 WooCommerce Post-Purchase Survey: 7 Questions, When to Ask and What to Do Next

WordPress Plugin
Updated
On this page
The SurveyNinja plugin for WordPress creates surveys with AI right in the block editor and shows them on your site: in the text of a post, as a popup, a button or a side panel. WooCommerce shops can also ask buyers after every order.
Before you start
- You need a SurveyNinja account. The free plan works with the plugin.
- Your site needs WordPress 6.7 or newer and PHP 7.4 or newer.
- The site must open over HTTPS. A localhost address also works while you develop.
- You need administrator rights in WordPress to install plugins.
Installing the plugin
- In WordPress, open Plugins → Add New Plugin.
- Search for SurveyNinja and click Install Now, then Activate.
The SurveyNinja menu appears in the admin sidebar with three pages: Surveys, Settings and WooCommerce. The plugin is also on WordPress.org.
Connecting your account
- Open SurveyNinja → Settings and click Connect account.
- Sign in to SurveyNinja, or sign up for free.
- Choose the workspace the site will work with.
The site gets access only to that workspace. You don't copy any API keys: the access tokens are stored encrypted in your WordPress database.
After connecting, Settings shows the account and its plan, your AI limits (AI survey builder, AI summary, AI assistant) and shortcuts to start.
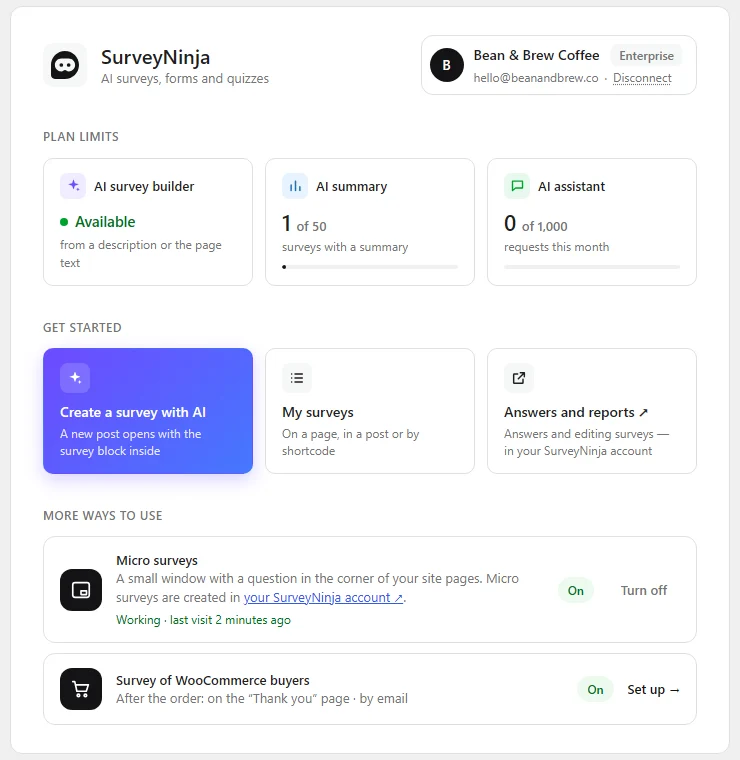
To connect another workspace, click Disconnect next to the account and connect again.
Creating a survey with AI
- Open a post or page and add the SurveyNinja block.
- Choose how to start:
– Describe: type what you want to ask, or click a template: NPS, Feedback, Lead quiz or Knowledge test.
– From the page text: AI builds questions from the title and text of the post open in the editor, even if it isn't saved yet.
– Choose existing: pick a survey you already have in SurveyNinja. - On the right, choose Survey, or Test with score for a quiz with correct answers.
- Click Create with AI.
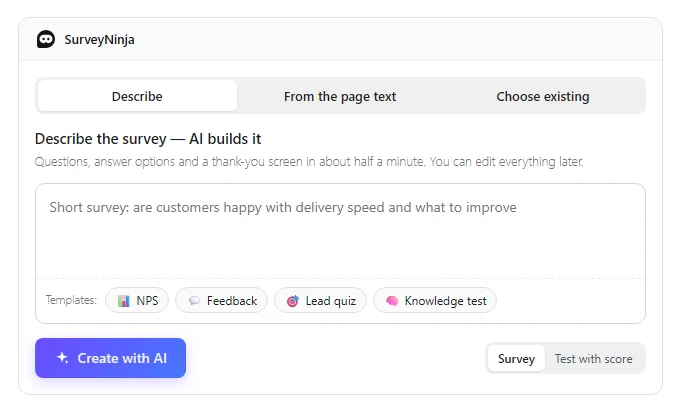
AI writes the questions, answer options and a thank-you screen in about half a minute. To change the survey, click Edit in the block: it opens in the SurveyNinja editor.
Choosing how to show the survey
When the block has a survey, choose one of the options under How to show on the site:
- In the text: the survey is part of the post. Set its height in the block settings on the right.
- Popup: opens when the page loads, after a delay, or, on desktop, when the visitor is about to leave.
- Button: a button in the text opens the survey in a popup.
- Side panel: slides in after the visitor scrolls.
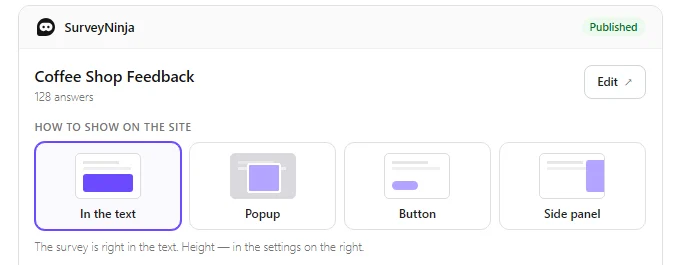
Below the options, the block shows what visitors will see.
Elementor and the Classic editor
- Elementor: add the SurveyNinja widget, choose a survey and how to show it. The modes are the same as in the block.
- Classic editor and page builders: use the shortcode. Open SurveyNinja → Surveys, click Copy next to a survey and paste the shortcode where shortcodes work. To show the survey as a popup, add mode:
[surveyninja id="123" mode="popup"]
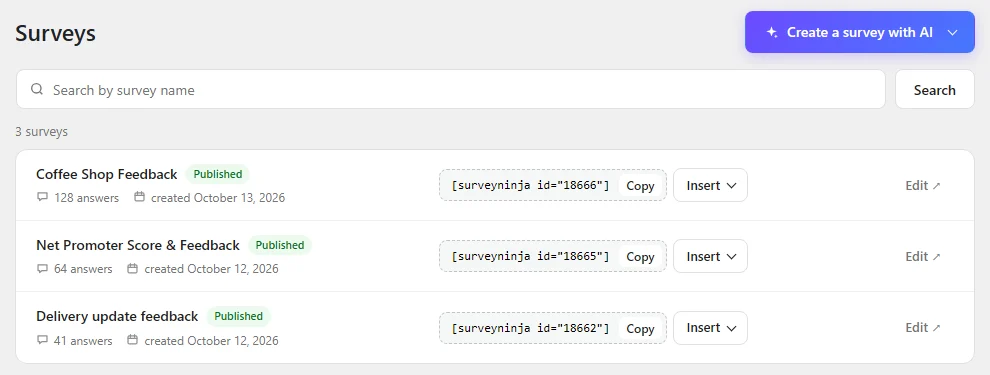
On the same page, Insert adds the survey to a new post or page, and Create a survey with AI starts a new one.
Surveys after WooCommerce orders
- Open SurveyNinja → WooCommerce and choose the Survey.
- In On the "Thank you" page, choose How to show and type a Heading above the survey.
- To also ask by email, select Email after the order. Set how many days after the order to send it, and edit the Subject, Text and Button. You can use {name}, {order} and {shop} in them.
- Click Save. To check the email, click Save and send me an example.
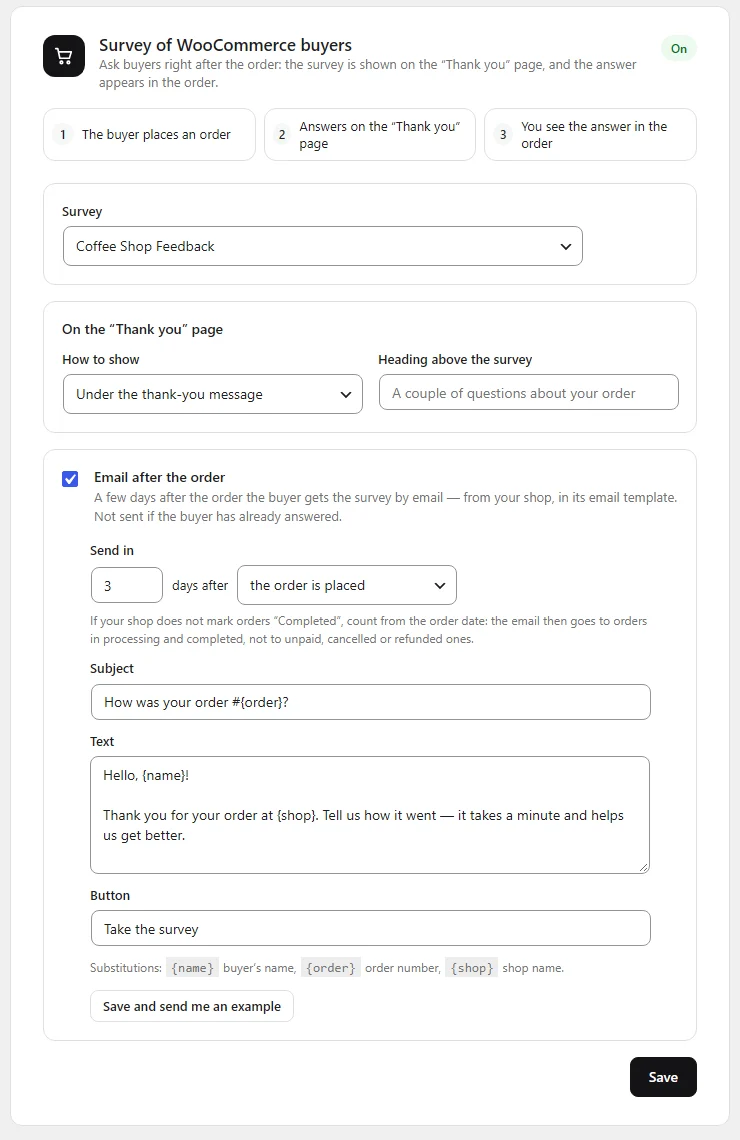
The buyer's answer appears in the WooCommerce order. The email is not sent if the buyer has already answered, and it goes only to orders in processing or completed, not to unpaid, cancelled or refunded ones.
Micro surveys on site pages
On SurveyNinja → Settings, under More ways to use, turn on Micro surveys. The micro surveys you create in your SurveyNinja account then appear in a small window in the corner of your site pages. Where, to whom and how often they appear is set in SurveyNinja.
What data goes to SurveyNinja
- The survey description you type, and for From the page text, the title and text of the post open in the editor.
- Visitors' answers, with the UTM tags of the page. If you turn it on, also the logged-in user's ID, role or email.
- For WooCommerce, only the order number with your site's signature. The email after the order is sent by your shop through WooCommerce, and the buyer's address is not sent to SurveyNinja.
- With every request: the site address, WordPress, PHP and plugin versions and the site language.
Limits
- AI survey creation, AI summaries and the AI assistant count against the limits of your SurveyNinja plan. Settings shows how much is left.
- The plugin works with one workspace at a time.
- Abilities for AI agents work on WordPress 6.9 and newer. They are private unless the site makes them public with the surveyninja_abilities_public filter.
If something doesn't work
- The Connect account button is missing. The site doesn't open over HTTPS. Turn on HTTPS for the site, then open Settings again.
- The survey doesn't appear on the page. The survey may be closed or unpublished in SurveyNinja. Open it with Edit and check that it is published.
- Micro surveys don't show. Check that Micro surveys is on in Settings and that the micro survey's display rules in SurveyNinja match the page.
- The email after the order didn't arrive. The buyer has already answered, or the order is not in processing or completed. Check the days you set in Email after the order.